Add A Place
Add Item
The Add Item Module contains all of the create functionality for every Object in the portal. Always start by finding the object you wish to add from the list of items in the Add Item Module (+ Sign). To add a Place, select Add Place from the list.
| Instruction | Example |
|---|---|
| 1.) Option 1: From the List Panel options in the Add Item (+ Sign) Module, Select “Add Place” | 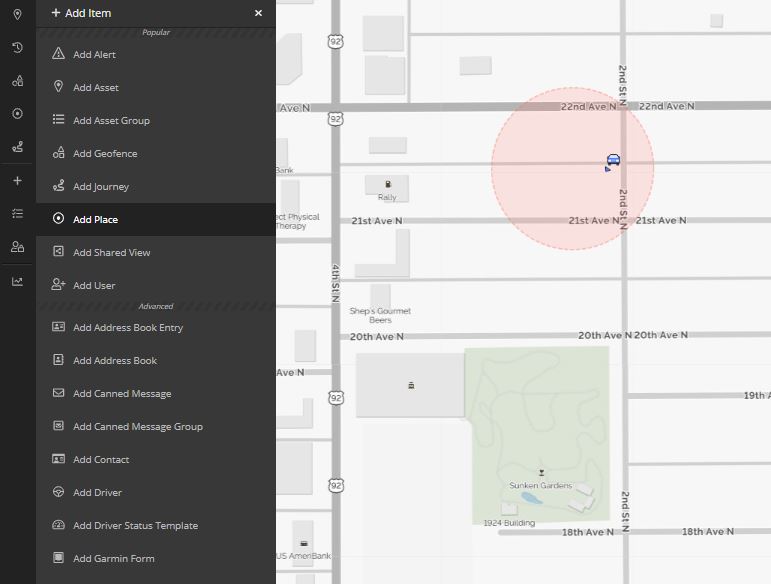 |
| 2.) Click the Position on the Map, Insert the Lat/Lng coordinates, or search the Address of the Place you wish to add |  |
| 3.) Name the Place (required), Select a Color (required), and then fill in any additional information in the Main, Users, or Attributes tabs, then click Create PLace to save it | |
| 4.) Option 2: From any reported position in Live Mode or History Mode on the Map View, Open the Quick Actions (Dot Menu) from the Position Details Box | 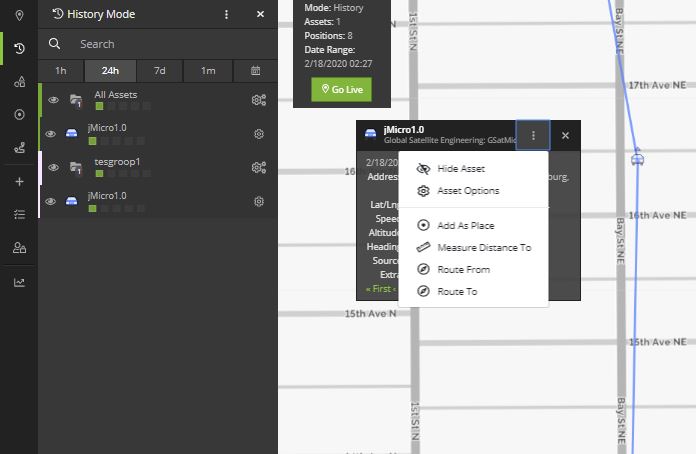 |
| 5.) Because the location data will pre-populate, Name the Place (required), Select a Color (required), and then fill in any additional information in the Main, Users, or Attributes tabs, then click Create PLace to save it | 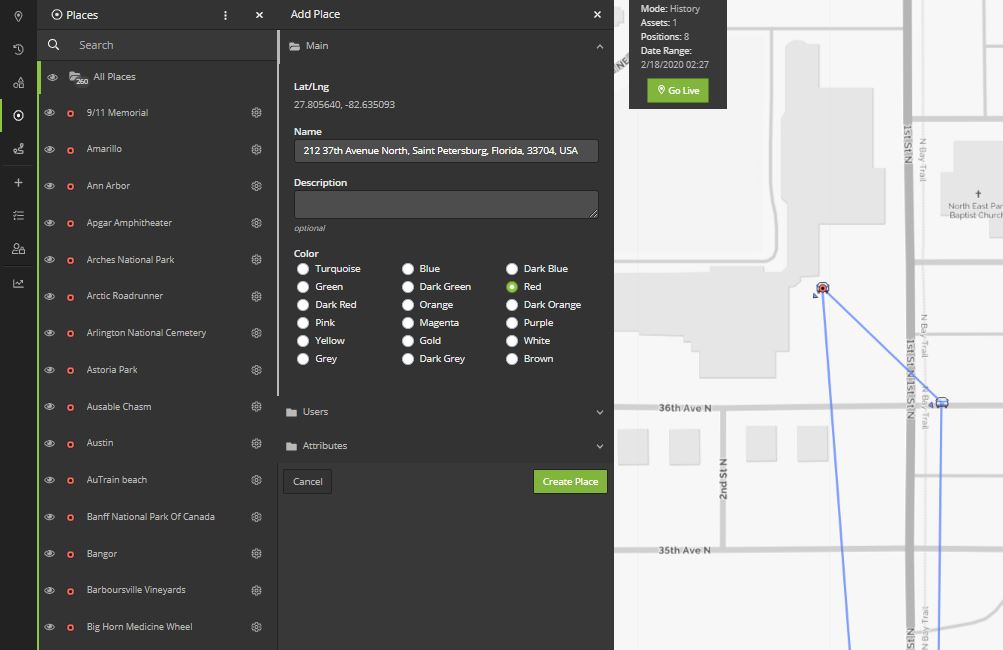 |
Place Data
Users will be prompted for the following information when creating a Place.
- Name: Default name is the address, name the Place however you want it to appear in the List Panel
- Description: Add a description of the place (optional)
- Color: Set the display color for the icon on the map and the text in the second panel
- Users: Assign the place to users so it is visible to those users
- Attributes: Contact (attach a contact to the place)
- Attributes: Photo (upload a photo)
- Attributes: Unique key for customer reference